Data Store
The Data Store feature in ZeuZ Server provides a unified interface to search, import, create, and manage datasets used in automated testing. It allows QA and development teams to easily handle structured data without relying on local files. This makes testing more reliable, consistent, and collaborative across environments.
Your data never leaves your browser unencrypted.
Key Features
- Centralized data management: Store all datasets in one place for consistent use across test cases and environments.
- Easy imports: Upload or merge existing CSV files directly into tables from the UI.
- Create blank tables: Prepare test tables without uploading data.
- Organized folders: Structure datasets by folder for easy navigation.
- Safe deletes: Recycle Bin prevents accidental loss with restore capability.
- Audit-ready: Actions (create, import, restore, edit) are traceable and timestamped.
- Export and reuse: Quickly export selected datasets for external use or archival.
Why it matters / Use Cases:
- Centralized Data Management: Allows users to store, update, and reuse test data across multiple test cases.
- Reduces Redundancy: Eliminates the need to manually input repetitive data during test execution.
- Ensures Consistency: Maintains uniform data values throughout tests, reducing chances of human error.
- Supports Dynamic Testing: Enables parameterized and data-driven testing for more flexible automation.
- Enhances Collaboration: Facilitates team access to shared datasets, improving coordination during test cycles.
Prerequisites
- Access to ZeuZ Server with permissions for Testing → Data Store → Data Store.
- Connection to relevant projects or test sets that utilize the stored data.
Quick-Start
- Click on the New Folder button to create a new folder.
- Use the search box to search the data store, then press Enter or click the Search icon.
- To import files or create a blank table, click Create, then choose Import from Files or Create Blank Table.
- Follow the modal steps:
- For import: Drag & drop CSVs, set per-file table names, resolve/accept duplicate merge warnings.
- For blank table: Enter a table name.
- Select a destination folder, review the summary, and submit.
- Use the Action Bar to delete, export, or view the Recycle Bin.
- To move items between folders, open the folder modal from a card and select the target folder.
Features
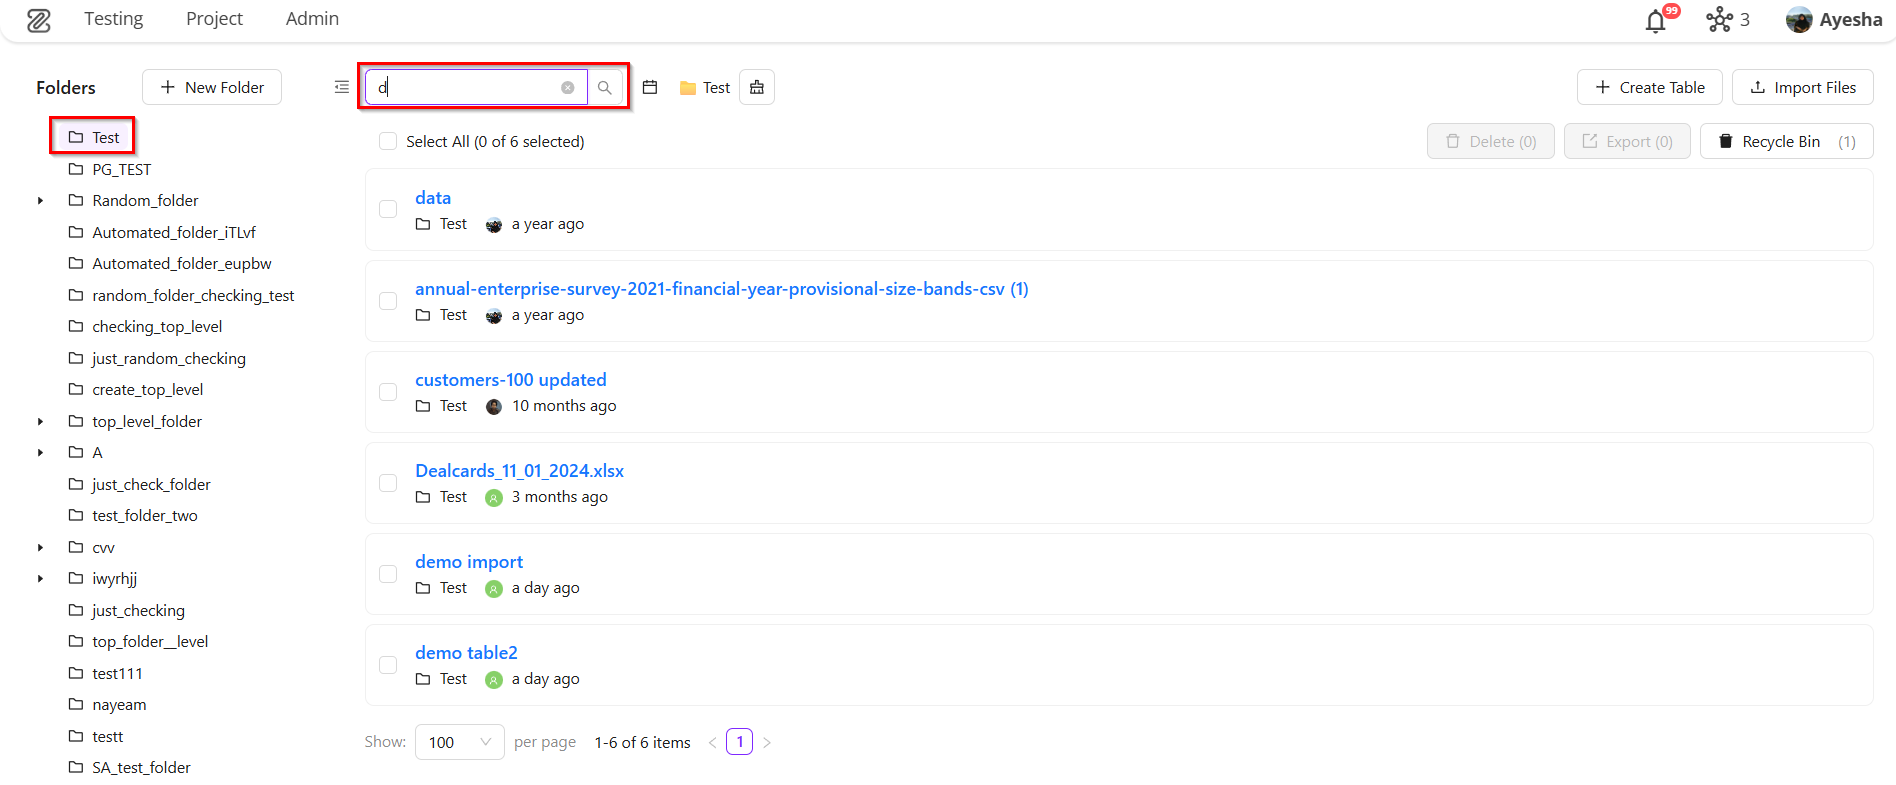
Search
- Selected a folder named Test and searched using the character d.
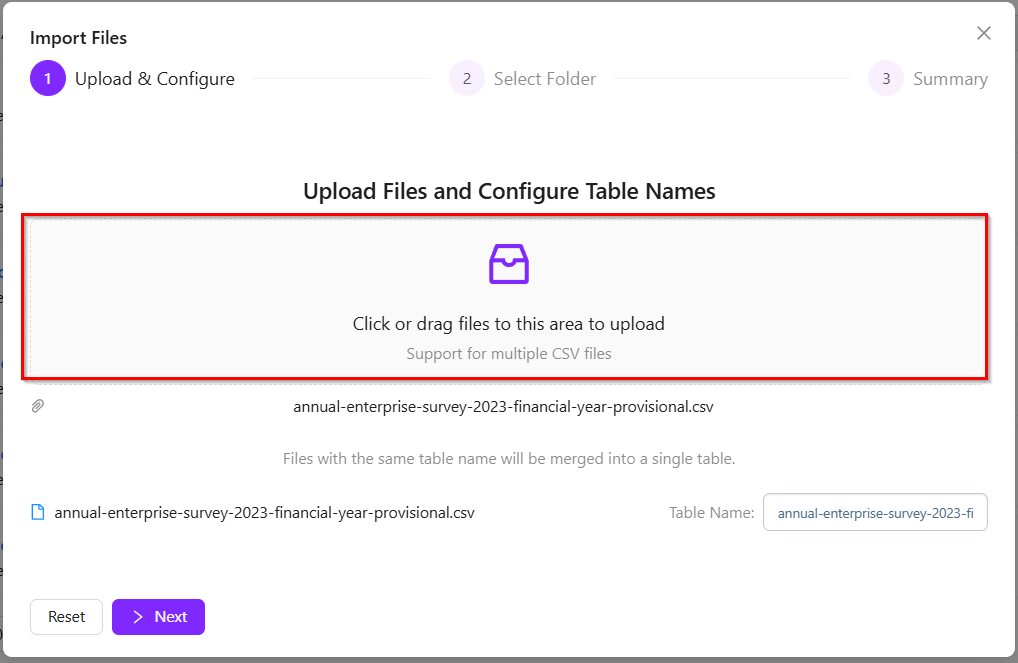
Import Files
- Click or drag files to this area to upload.
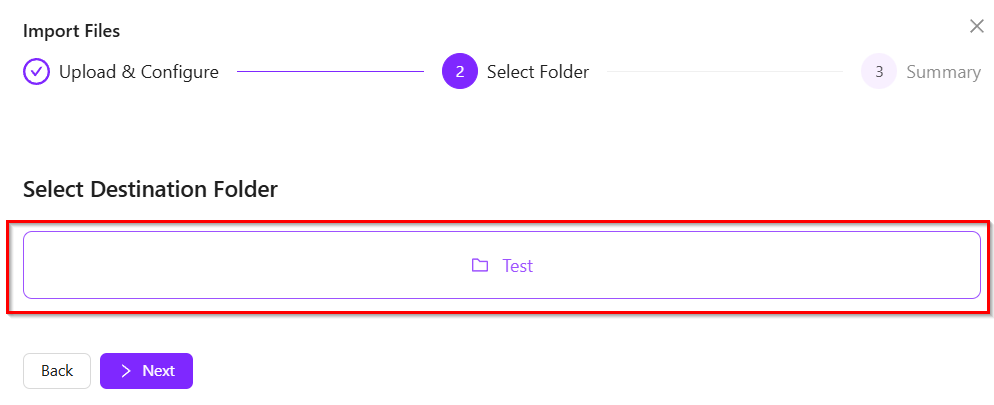
- Click to select a folder.
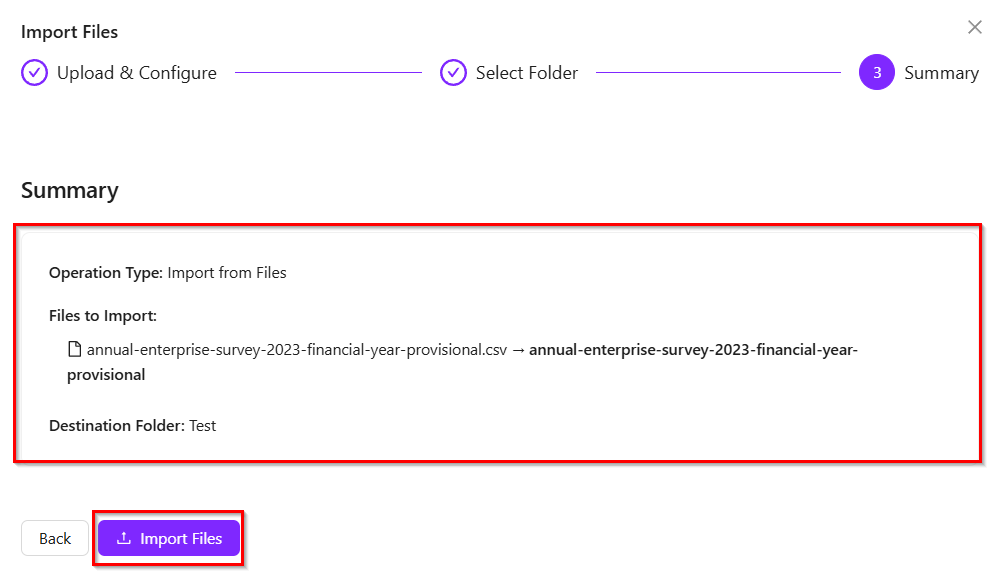
- Review the items and import them by clicking the Import Files button.
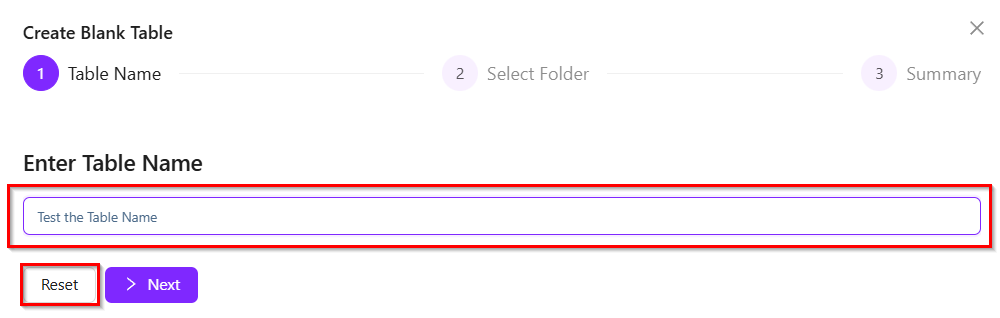
Create Table
- Enter Table Name.
- If it is necessary to reset the table name, click the Reset button.
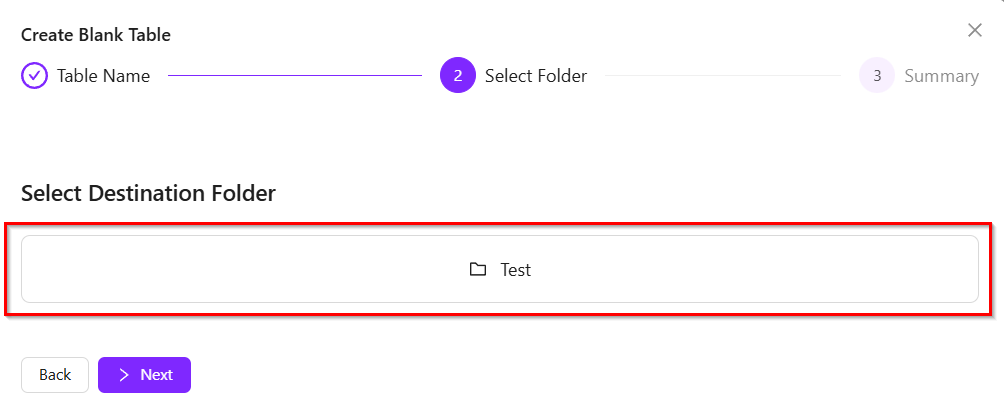
- Click to select a folder.
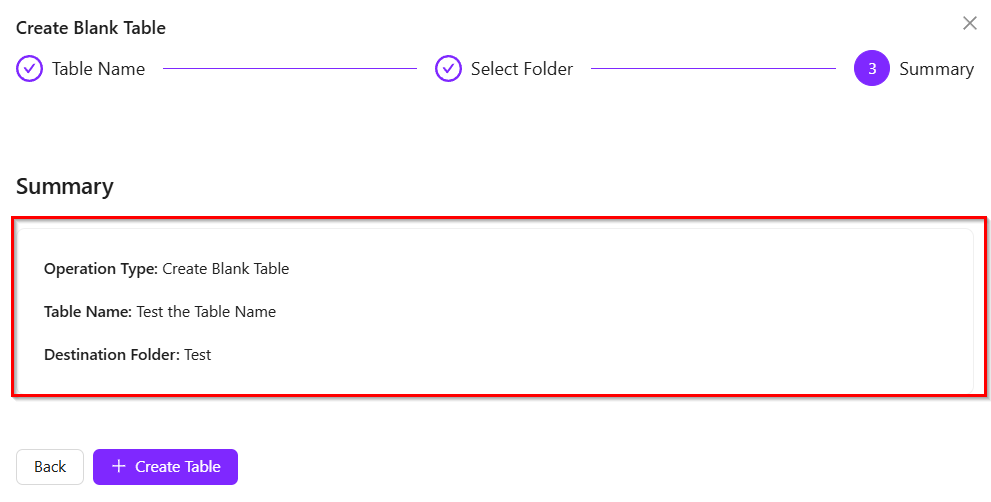
- Click to view the summary.
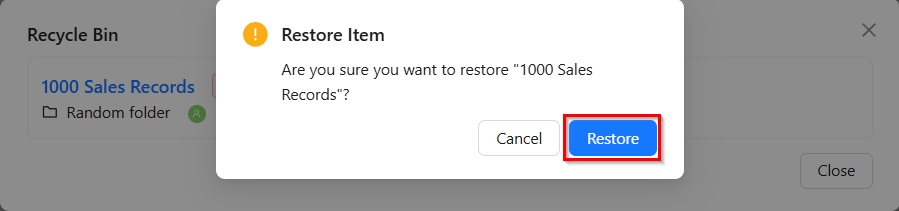
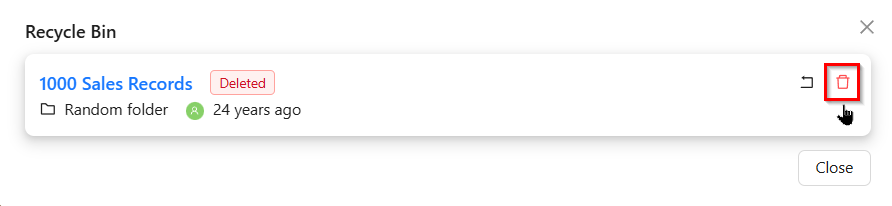
Recycle Bin
- Click the Recycle Bin button.
- If it is necessary to restore the deleted items, click the Restore button.
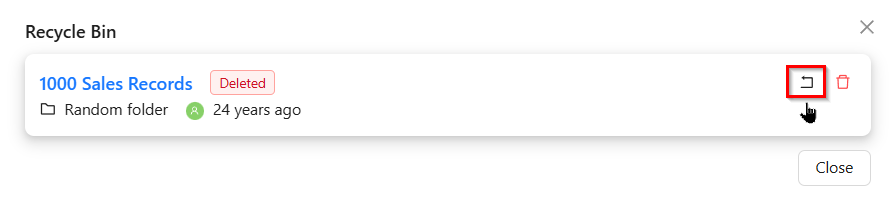
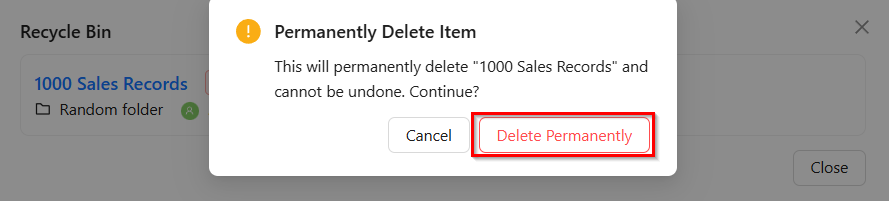
- If it is necessary to delete the items permanently, click the Delete Permanently button.
Change Folder
- Click the folder name, such as "PG TEST"
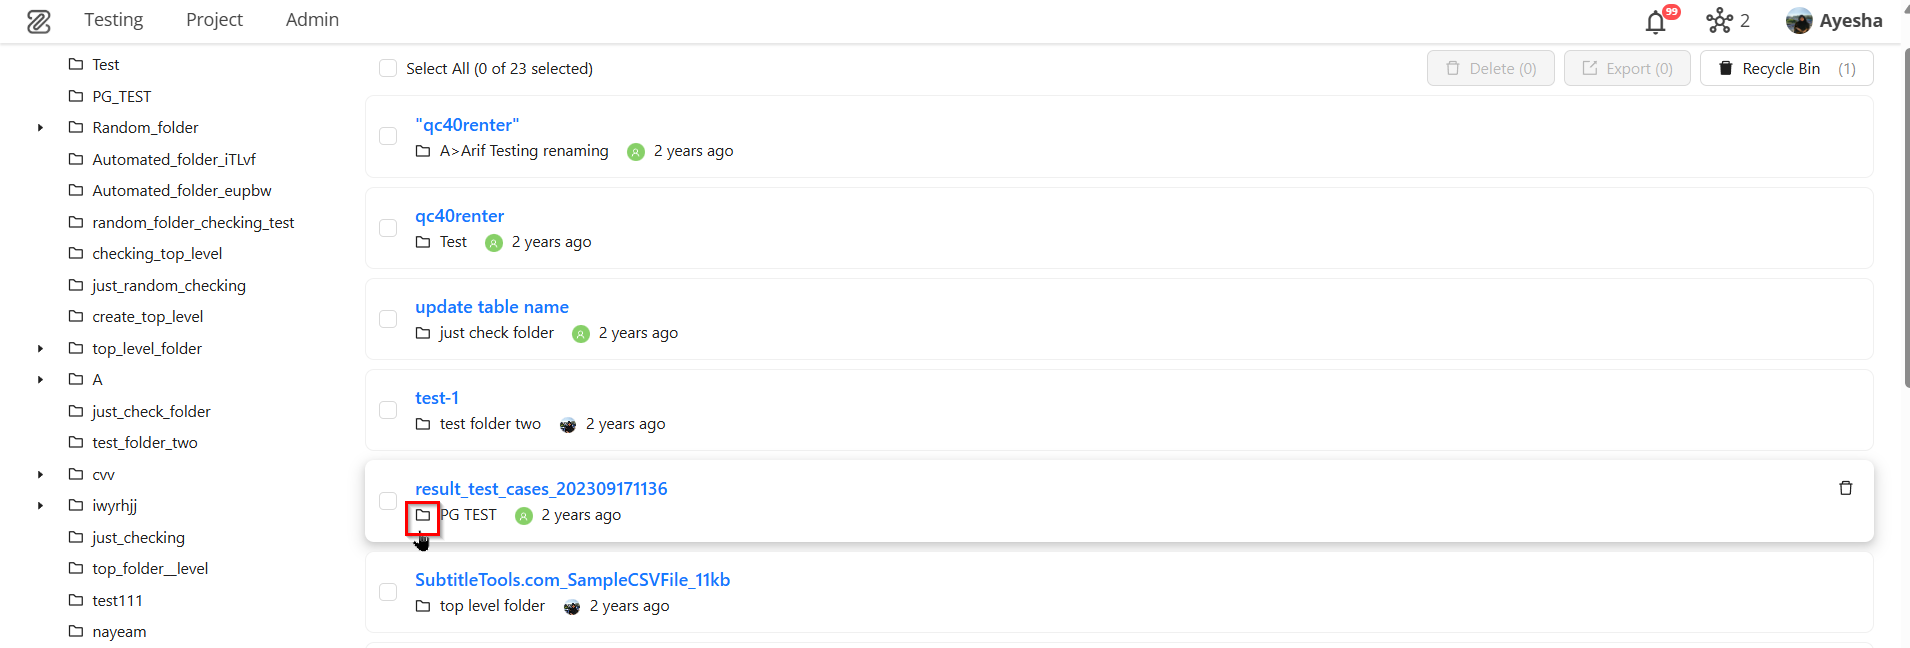
- Select the desired new folder, then click "Select" to move it.

FAQs / Troubleshooting
FAQs
What should be done if the import reports a DuplicateTableNameException?
If duplicate table names are detected, the UI shows a merge warning. Rename the files to use unique table names or accept the merge. The import response displays error codes and file results.
Why am I unable to proceed in the Create modal?
Required fields, such as table names for imported files or blank table names, must be filled in. The modal validates these fields before enabling the Next or Finish button.
Files are not appearing after import - what should I do?
On success, the UI refreshes the datastore and folder queries. If files are still missing, check the destination folder filter, refresh or re-run the search, and verify the import status in the API response or server logs.
I accidentally deleted items - can they be recovered?
Yes, open the Recycle Bin and use Restore. If the items were permanently deleted, recovery is not possible through the UI.
What should I do if the export fails or the download does not start?
Confirm network connectivity and ensure the server successfully prepared the export. If the UI shows a message but the download does not start, check browser popup settings and the network response for errors.
Troubleshooting
- Permission / Auth Errors (401 / 403): Verify auth token/session, user role, and that requests include required headers/cookies. Check network tab for auth failures.
- Large File Imports / Timeouts: Split very large CSVs.
- CSV Format Problems: Validate delimiter, encoding (use UTF-8), header consistency and absence of BOM. Corrupt or irregular rows commonly cause import errors.
- Folder Tree Lazy-Load Failures: Ensure your internet connection is good. Try by reloading the page.
- Stale UI / Cache: If the UI shows an outdated state, perform a hard refresh.
Changelog
- New UI has been introduced [20250818]
- Batch processing for multiple file uploads with single interaction is implemented [20250818]